Tuesday 14 December 2010

DVD menu Complete and Burned

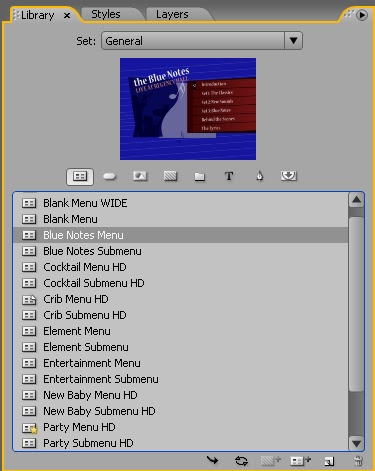
I have finished my DVD menu and have reached the final stages of my project.

I have now moved onto my Evaluation and completed. This essay like document explains everything I have learnt about myself throughout the project, all the new skills I have learnt and finally. It is important to evaluate yourself very hard. 

After this I moved onto burning my DVD and i encountered a problem with my menu's and had to reload them all and it Built and Burnt.
I used 4.7GB, 16x DVD-R but only used 800 Megabites but my menu did not have a movie on it.

Then i played it with PowerDVD and it didnt have one of my menu's linked to the main menu instead it went to the start. So i had to relink it and then burn a final with one of my Dads discs.

Overall i had alot of difficulties but i am happy with my final product.

DVD Menu - Sound in Sony Vegas

I used Sony Vegas to edit all my sound this is very good program for this, becuase originally was only used for sound.  I used this program to combine my sound track and fade down and fade on. I found this program very useful in what i needed to do.

DVD Menu - Building

Combining all my Pre production, production also Post production such as flowcharts, storyboards, Sketches, animations, videos and menus I've designed and created etc. All these materials have been combined into a DVD Menu. This is a long process with their being about 70 different interactive links.

I started by Creating a new project and setting  up a new project using Pal DVD settings, now i have a blank project. As my first auto play i have the Unincluded Productions title sequence timeline by setting it to first play.
From then i have my first language menu then on to my three trailers Skyline, Watchmen and Cowboys vs aliens which are also sci-fi trailers.

After it starts up my Main menu with i created with a video and sound file also with a few layers and text which leads to Scene Selection, Setup and Bonus Features. Then i went though the long put satisfiing job of linking everything back with each other so that theres a path that the audience can use.

The final step is extensive testing, making sure all you links work and in your set sequence with no glitches. This is a time consuimg but vital exercise and decreases the margin of error. At the time of writing I am only having 1 Audio issue on an animation but the rest seems to be working. Soon I will have to start testing on Third Parties.

Monday 13 December 2010

Responding to Feedback


I had a feedback session with Harry Dhami and we esablished that i was a bit behind and i needed to step up. My action points were to Update my Blog i solved this because I'm writing about this now.
To Create my DVD menu by the set date but i could not do that due to the snow day. So I'm going to hand it in the next week.
I have to Refer to the production guidelines, i have read the production guidelines thoroughly and i am aiming for a distinction but i don't think i will be able to write enough in the time given.

Finally i will refer to the assignment in my evaluation and blog thoroughly. I only have left to complete my evaluation and write my final conclusion in my production scedule.


DVD Menu Play Piracy video

When the you press play on the DVD it comes up with a piracy warning ad video. I will be putting this on because i want to add more realism Moreover professionalism to the Menu. 

I downloaded this Video .Mpg file off of YouTube using my YouTube Downloader HD.


DVD Menu created Title Unincluded Productions

This is my company name that i use on all my videos and i recently created a Opticle Flares HD version. This is going to be my initial Starting Video to show who this is made by. Some people ask "i have never seen a title sequence that long?". There is one check out the Dolby Digital one.

DVD Menu Planning

Before making (building) the menu i will have to plan it. The two documents i will create are a Storyboard and a flow chart.

For the storyboard, I had 6 boxes showing the screen size, (PAL Widescreen Square Pixel), also the Duration of the shot or sequence. This will include animations and movie files. This is a technique more regularly attatched to the film making process but it applies and is helpfull here for breaking down the animation and flow of the media.

The flow chart is the main way to organise and think of where to place elements in our DVD.  The Chart shows every item, asset, timeline, menu etc that makes up your full menu. Then, you can draw lines from item to item in the specific order with links and end actions.
It acts like a map for the programmer and saves you having to contantly "Check Project". Using Flow Charts you can know how everything will run when you actually build the menu on Encore and export it.


Psd's

These are the PSD's i created.
The last 'Denied' picture is for a link after my scene selection buttons had been pressed to show that i have not got a movie on this DVD.

Photoshop Animation

Photoshops has a variatie of uses one is creating simple animations which can be exported to other programmes. I didn't know how to do basic Photoshop Animation when i first started, which i had to learn. but it was basic and easy. This is because Animation on Photoshop is a very limited process and doesn't let you create complicated animations. Im thinking about using it to create a 3D animation.

Photoshop animation has one problem you cannot change the size or rotation without affecting each frame, so the trick is you have to get a different layer and fade the opacity as the other comes on, therefor looking like it's shinking or turning. So basically to get altered image I want on screen without changing every other frame, raise this layers Opacity to 100%. Everything else you don't want visibile should be altered to 0%. Doing this for every frame will give you the effect you want.

Using the first U.F.O picture in my movie poster.

DVD Menu Moodboard

Then next we had to design a DVD menu Mood board, for my case I designed one in the genre of Sci-Fi which I annotated, by taking pictures that are relevant and I might use due to the connotations and denotations. I thought the finished mood board represented well the theme that I was aiming for, but I think I should have added more text.

The colour is very vicious and terifing can be used to scare and amaze people showing a vast destructive atmosphere.  

These dark and red also yeallow colours are probably going to be used as the main atmosphere.

I will use this colour for alien spot searchlights and general colour tint also this colour makes you think of new or advanced technology.

The burning of the photo shows a destroying something nice and old describing
 the terrible things to come (used as a metphore). I thought this is very
effective because  the UFO is so plain it lets the backround shine though
 to this obvious image of the UFO’s being responcerble.

The Grass is too show a insucureness because
it can show humans being brought out of society
because they’ve run away.

Encore Learnt

I have been learning encore more and more this week.
After experimenting with most techniques i have managed to learn the basics on of Adobe Encore Such as Compatability with images sound and video incorparated as timelines, menus' plus as assets. I have learnt successfully how to use buttons (+) such as highlights roleovers (=2) and (=1) and how they effect colour due to what type of object used.

I came across problems with Image size compatability and streched pixels to fix this i used the Pal Widescreen square pixel which fitted perfectly on the 16:9 encore workspace. Furthermore i worked out how to import audio and video to a menu and what format is best, the format was m2v (Video) and .Wav files (sound). I encountered a problem with encore on my computer at home. It would crash everytime i start it up but this was fixed by me uninstalling quicktime on my computer because there was a transcoding error. I found this fix by going on to adobe forums and searching for my problem.

Generating images over half term

During half term I have been capturing original images for my DVD menu. I chose to take pictures round my house because I don't have to go anywhere and there's plenty of places I shot.
I grabbed and shot the images I could of the list I made.


Click on it to view a picture.

I shot my photo images with my Speed 8-tz video camera which has a 12 megapixel camera and the advantage of this is that my images won't ever be pixelated when edited. I also used my Tripod with the camera attached for all my shots

Tuesday 7 December 2010

Encore

This week is my first time into Adobe Encore CS3. This is Adobe's DVD Authoring editing software basically allowing the user to create detailed DVD Menus, the reson why this software is so popular is because of the ease of publishing a project or product.
I already new the basics of creating a dvd menu and also used an encore Information supplied tutorial booklet. I new about how to set up a new project by switching to PAL for Enlgland (Region 2) instead of NTSC used in North America, this means it'll work in the UK where we are planning to use it. In terms of terminology, what I would have usually called a movie clip is actually a timeline. Differing between different imports such as Timelines, Assests, Slideshow and Menus. This also makes it easier to clean up your project menu, where you can seperate things into files, similarly to Photoshop and its Layer Groups.


In terms of putting all the components together it was pretty self explanatory, with the interface using the "pickwhip" to drag over to your required selection. This makes linking quick and easy , so once I have imported my Timeline and uploaded a Menu from the Library panel they can be easily linked. It is important to check that everything is linked properly and this can be done quickly by either previewing the project or using the "Check Project" feature. This basically checks if you have any loose ends or unlinked pages so you can get to the problem quikcer.